Top-100-Restaurants in America

Top 100 Restaurants in the USA (Revenue)

Top 100 Restaurants in the U.S.A (Revenue).

View the list of the top grossing restaurants in the US.

Did you ever wonder, which independent restaurants brings in the most dollars on a daily and yearly basis in America and in your city? Maybe you have already been to one of the restaurants on this list, without realizing that it was one of the most popular in the country.

If you are planning a trip out of state, it might be worth checking out one of these indepent restaurant chains. After all, popularity is often a sign of value for money, if not quality.

The list below shows the top-grossing restaurants chain with a maximum of 5 locations in America in the year 2014-2015.

Many of the numbers are estimates, however, based on surveys sent to the independent restaurant owners. So, they numbers must be taken with a grain of salt. The numbers are not all based on publicly available information, but rather on self-reported numbers by the restaurants.

However, interestingly, 27 of the top 100 are in New York City and 20 of the top 100 are in Las Vegas.

The list shows the name of the restaurant, followed by city location and yearly revenue.

Top-100-Restaurants in America

Top 100 Restaurants in the U.S – Revenue.

1: Tao Asian Bistro – Las Vegas $64,600,000

2: Joe’s Stone Crab – Miami Beach $35,324,729

3: Old Ebbitt Grill – Washington $26,687,861

4: Smith & Wollensky – New York City $25,470,115

5: Lavo Italian Restaurant – Las Vegas $24,000,000

6: Prime 112 – Miami Beach $23,345,678

7: Tao New York – New York City $22,770,515

8: Gibsons Bar & Steakhouse – Chicago $22,397,732

9: Buddakan – New York City $21,500,000

10: Joe’s Seafood, Prime Steak & Stone Crab – Chicago $21,000,000

11: Fulton’s Crab House – Lake Buena Vista $20,500,000

12: Joe’s Seafood, Prime Steak & Stone Crab – Las Vegas $20,100,000

13: Carnevino – Las Vegas$19,000,000

14: SW Steakhouse – Las Vegas $18,600,000

15: The Hamilton – Washington $17,855,655

16: Sparks Steak House – New York City $17,600,000

17: Prime Steakhouse – Las Vegas $17,300,000

18: Bob Chinn’s Crab House – Wheeling $17,208,566

19: ’21’ – New York City – $17,119,818

20: Mon Ami Gabi – Las Vegas $17,000,000

21: Del Posto – New York City $16,500,001

22: The Slanted Door – San Francisco $16,500,000

23: Balthazar – New York City $16,200,001

24: Grand Central Oyster Bar – New York City $16,150,000

25: St. Elmo Steak House – Indianapolis $16,149,562

26: Guy’s American Kitchen & Bar – New York City $16,000,000

27: Top of the World – Las Vegas $15,900,000

28: Wolfgang Puck Grand Café – Lake Buena Vista $15,800,000

29: Quality Meats – New York City $15,782,812

30: Abe & Louie’s – Boston $15,600,000

31: Hugo’s Frog Bar & Fish House – Chicago $15,485,723

32: Scoma’s – San Francisco $15,350,370

33: Chops Lobster Bar – Atlanta $15,000,001

34: Sequoia – Washington $15,000,000

35: SkyCity at the Needle – Seattle $14,900,000

36: Angus Barn – Raleigh $14,850,000

37: Gladstones – Pacific Palisades $14,800,002

38: The Manor – West Orange $14,800,001

39: Spice Market – New York City $14,800,000

40: Junior’s (Brooklyn) – New York City $14,500,000

41: The Lobster House – Cape May $14,500,000

42: Gibsons Bar & Steakhouse – Rosemont $14,420,693

43: Blue Fin – New York City $14,400,000

44: The Sea Grill – New York City $14,100,000

45: Coffee Shop – New York City $13,800,000

46: The Four Seasons – New York City $13,800,000

47: Harry Caray’s Italian Steakhouse – Chicago $13,800,000

48: The Milleridge Inn – Jericho $13,800,000

49: Virgil’s Real Barbecue – New York City $13,600,000

50: Zehnder’s of Frankenmuth – Frankenmuth $13,546,914

51: Harris Ranch Inn & Restaurant – Coalinga $13,360,934

52: The Bazaar by José Andrés – Beverly Hills $13,300,001

53: Delmonico Steakhouse – Las Vegas $13,300,000

54: Portland City Grill – Portland $13,297,831

55: Rock Center Café – New York City $13,250,000

56: N9NE Steakhouse – Las Vegas $13,200,000

57: Gibsons Bar & Steakhouse – Oak Brook $13,137,712

58: Shaw’s Crab House – Chicago $13,100,000

59: Quartino Ristorante & Wine Bar – Chicago $13,000,495

60: Blue Water Grill – New York City $12,950,000

61: Atlanta Fish Market – Atlanta $12,900,000

62: Mike’s “American” – Springfield $12,880,000

63: Boulevard – San Francisco $12,800,000

64: Cafe Fiorello – New York City $12,700,000

65: George’s at the Cove – La Jolla $12,600,000

66: Craftsteak – Las Vegas $12,600,000

67: Junior’s (Times Square) – New York City $12,500,000

68: Keens Steakhouse – New York City $12,400,000

69: Jean-Georges Steakhouse – Las Vegas $12,100,001

70: Parc – Philadelphia $11,900,000

71: Tower Oaks Lodge – Rockville $11,800,002

72: Daniel – New York City $11,800,001

73: Bryant Park Grill – New York City $11,800,000

74: Mesa Grill – Las Vegas $11,800,000

75: Cliff House – San Francisco $11,700,000

76: Fix – Las Vegas $11,680,000

77: Trattoria Dell’Arte – New York City $11,650,000

78: Bartolotta Ristorante Di Mare – Las Vegas $11,600,001

79: StripSteak – Las Vegas $11,600,000

80: Emeril’s Orlando – Orlando $11,300,000

81: Gotham Bar and Grill – New York City $11,200,002

82: Jackson’s Mighty Fine Food & Lucky Lounge – Reston $11,200,001

83: Harley-Davidson Café – Las Vegas $11,200,000

84: Frankenmuth Bavarian Inn – Frankenmuth $11,199,229

85: Kowloon – Saugus $11,100,000

86: Daniel’s Broiler – Bellevue $11,081,727

87: Eiffel Tower Restaurant – Las Vegas $11,000,000

88: Zeffirino – Las Vegas $10,900,001

89: Aureole – Las Vegas $10,900,000

90: California Grill – Lake Buena Vista $10,800,000

91: Maloney & Porcelli – New York City $10,727,779

92: Buddakan – Philadelphia $10,700,001

93: Redeye Grill – New York City $10,700,000

94: Coastal Flats – Fairfax $10,560,000

95: Greek Islands – Chicago $10,500,000

96: Morimoto – New York City $10,500,000

97: The Continental Mid-town – Philadelphia $10,300,001

98: Willow Creek Farm – Broadlands $10,220,570

99: Salty’s on Alki Beach – Seattle $10,200,000

100: Sweetwater Tavern – Falls Church $9,890,000


The list is compiled by the industry leader magazine RestaurantsOnline.

Mcdfoodforthoughts: Take the Mcdonald’s Food for Thought Survey for Free Food

McDFoodforThoughts.com is McDonald’s official customer feedback survey for the UK and Ireland. Complete it after a recent visit and you’ll typically receive a voucher code for a discounted meal on your next trip. Below is a complete, step-by-step guide covering the rules, requirements, how to take the survey, common problems, tips, and a detailed FAQ section.

Quick Facts: McDFoodforThoughts at a Glance

  • Official site: mcdfoodforthoughts.com
  • Where it applies: Participating McDonald’s restaurants in the UK, Scotland, Wales, and Ireland
  • Who runs it: Service Management Group (SMG), on behalf of McDonald’s
  • Code format: A 12-digit code printed on your receipt
  • Receipt window: Commonly around 30 days from purchase, though some receipts allow up to 60 days — check the date printed on yours
  • Minimum age: Typically 16 or 18, depending on the current terms — check the age stated on the survey page
  • Time to complete: About 2–5 minutes
  • Typical reward: A discounted meal — for example, a Big Mac, McChicken, Filet-O-Fish, Quarter Pounder, McPlant, or 6 Chicken McNuggets with medium fries or a side salad, commonly priced around £2.99 in the UK (roughly €3.90 for a comparable offer in Ireland)
  • Voucher validity: Usually around 30 days after you complete the survey

Jump to the Step-by-Step Guide ↓

What Is McDFoodforThoughts.com?

McDFoodforThoughts, also known as McDonald’s Food for Thought, is McDonald’s official customer feedback programme for restaurants in the UK and Ireland. It’s operated on McDonald’s behalf by SMG (Service Management Group), the same company that runs similar feedback platforms for other major restaurant brands. After a visit, your receipt usually carries an invitation to complete the survey online, along with a 12-digit code you’ll need to get started.

In exchange for a few minutes of honest feedback about your visit — covering things like food quality, order accuracy, staff behaviour, cleanliness, and speed of service — you typically receive a voucher code for a discounted meal on a future visit. The survey isn’t a test, and giving critical feedback doesn’t disqualify you from the reward; McDonald’s wants genuine answers so it can identify what’s working and what needs fixing at specific restaurants.

It’s worth noting this programme is separate from McDVoice, which is McDonald’s equivalent survey for U.S. locations. If your receipt is from a UK or Irish restaurant, McDFoodforThoughts is the correct site to use.

McDFoodforThoughts Rules and Requirements

Exact terms can shift slightly over time and by location, but the following requirements are consistent across most current guidance for the UK and Ireland programme:

  • You need a valid receipt. The receipt must be from a participating McDonald’s in the UK or Ireland and carry the 12-digit survey code.
  • Take the survey within the printed window. Many receipts allow around 30 days from your purchase date, though some guidance cites up to 60 days — the expiry printed on your specific receipt governs your entry.
  • Age requirements apply. Sources cite either 16 or 18 as the minimum age depending on the current terms — check the age requirement stated on the survey page itself before you begin.
  • Residency: The programme is intended for customers of participating UK and Ireland restaurants.
  • Current and former McDonald’s employees, and their immediate family, are generally excluded from participating, to keep feedback independent.
  • One survey per receipt. Each receipt and its 12-digit code can only be used once.
  • Vouchers are single-use only and are redeemable in-store only — they can’t be exchanged for cash, sold, or transferred to someone else.
  • No purchase is needed to redeem the voucher once you have it, but you must have made an original purchase to get the receipt and code in the first place.
  • Honest answers only. Genuine feedback is the goal — fabricated or irrelevant responses can affect your entry.
  • Internet access is required. The survey is completed online at mcdfoodforthoughts.com, not by phone or in person.

Step-by-Step: How to Take the McDFoodforThoughts Survey

  1. Keep your receipt after your visit. Look for the 12-digit code, usually printed near the top of the receipt, along with the survey invitation.
  2. Go to the official site. Open a browser on your phone or computer and visit mcdfoodforthoughts.com directly — avoid links from unofficial third-party pages or ads.
  3. Select a language if prompted. English is the default, though other options may be available.
  4. Enter your receipt details. Type in the 12-digit code, along with the store number, date, and time of your visit (and, on some receipts, the amount spent).
  5. Answer the survey questions. Expect questions about food quality, order accuracy, staff friendliness, cleanliness, and overall satisfaction. Most people finish in 2 to 5 minutes.
  6. Add comments if you’d like. Optional text fields let you elaborate on anything that stood out during your visit.
  7. Submit the survey. You’ll receive a validation code or QR code on the confirmation screen.
  8. Save your code. Write it on your receipt or take a screenshot so you have it ready for your next visit.
  9. Redeem your voucher in-store. Within the stated validity window (commonly around 30 days), scan the QR code at a self-order kiosk, enter the alphanumeric code at a kiosk, or show it to a crew member at the till.

Tips and Hacks for a Smooth Experience

  • Photograph your receipt straight away. Thermal receipts fade over time, and a backup photo means you’ll always have a readable copy of your 12-digit code.
  • Don’t leave it too long. Even with a generous receipt window, taking the survey sooner rather than later avoids the risk of forgetting or losing the receipt entirely.
  • Double-check every digit. A single mistyped character in the 12-digit code is the most common reason the survey site rejects an entry.
  • Write your voucher code down immediately. The validation code appears once at the end of the survey — save a screenshot or write it on your receipt right away rather than relying on memory.
  • If a kiosk rejects your code, try the till instead. Some users find self-order kiosks occasionally reject a valid code; a crew member entering it manually usually resolves the issue.
  • Bring your original receipt when redeeming. Showing the receipt alongside your voucher code helps staff verify the redemption quickly if there’s any issue.
  • Use the voucher before it expires. Vouchers are generally valid for about 30 days after you complete the survey and are not extended once expired.
  • Be specific in your comments. If something was genuinely wrong with your order, naming the exact item helps the restaurant address it — and won’t affect your ability to redeem your reward.

Common Problems and How to Fix Them

  • “My 12-digit code isn’t working.” Recheck every character against your receipt, confirm you’re within the valid time window, and make sure you’re on the official mcdfoodforthoughts.com site.
  • “The kiosk won’t accept my voucher.” Try redeeming at the till with a crew member instead, and have your receipt on hand to help verify the redemption.
  • “My receipt is older than the stated window.” Once the window has passed, the code generally stops working — the survey and reward are tied to that specific visit, so a fresh receipt is needed to try again.
  • “I lost my receipt after completing the survey.” Since your voucher and original receipt work together for verification, losing the receipt can make redemption harder — this is why photographing it as a backup is worth doing.

Frequently Asked Questions

1. What is McDFoodforThoughts.com?

It’s McDonald’s official customer feedback survey for the UK and Ireland, run on the company’s behalf by SMG, that collects feedback about a recent visit in exchange for a discounted meal voucher.

2. Is McDFoodforThoughts a genuine McDonald’s survey?

Yes. It’s the official feedback platform tied to receipts from participating McDonald’s restaurants in the UK and Ireland, operated by SMG.

3. Do I need to buy something to take the survey?

Yes, you need a receipt from a recent visit to a participating McDonald’s with the 12-digit survey code printed on it.

4. How old do I need to be to take part?

Minimum age requirements are typically stated as either 16 or 18 depending on current terms, so check the age requirement on the survey page itself before starting.

5. Where do I find the survey code on my receipt?

Look for a 12-digit code, usually printed near the top of your McDonald’s receipt alongside the survey invitation.

6. How long do I have to complete the survey after my visit?

Most receipts allow around 30 days from the purchase date, though some guidance cites windows as long as 60 days — check the expiry printed on your own receipt.

7. How long does the survey take to complete?

Most people finish in about 2 to 5 minutes.

8. What questions does the survey ask?

Expect questions about food quality, order accuracy, staff friendliness, restaurant cleanliness, speed of service, and your overall satisfaction with the visit.

9. Do I have to leave a positive review to get my voucher?

No. The survey is designed for honest feedback, and giving a critical review doesn’t disqualify you from receiving the reward.

10. What reward do I get for completing the survey?

Typically a discounted meal, such as a Big Mac, McChicken, Filet-O-Fish, Quarter Pounder, McPlant, or 6 Chicken McNuggets with medium fries or a side salad, commonly priced around £2.99 in the UK, with a comparable offer around €3.90 in Ireland.

11. How long is my voucher valid after I finish the survey?

Vouchers are typically valid for around 30 days after you complete the survey.

12. Can I take the survey more than once?

Yes, as long as you have a separate receipt with its own valid 12-digit code for each attempt.

13. Can I use the same receipt to enter the survey twice?

No, each receipt and its code can generally only be used for one survey entry.

14. Can McDonald’s employees take the survey?

Current and former employees, along with their immediate family, are generally excluded from participating to keep feedback independent.

15. Can I redeem my voucher for cash?

No. Vouchers are promotional rewards, not cash equivalents, and can’t be exchanged for cash.

16. Can I give my voucher code to someone else?

Generally, no. Vouchers are meant to be used by the person who completed the survey and are not transferable.

17. Can I combine my voucher with other offers or discounts?

Typically not — vouchers usually can’t be stacked with other promotions or discounts.

18. How do I redeem my voucher in-store?

You can typically scan the QR code at a self-order kiosk, enter the alphanumeric code at a kiosk, or show the code to a crew member who will input it for you at the till.

19. What if a kiosk rejects my voucher code?

Try redeeming the code at the till with a crew member instead, and bring your original receipt to help verify the redemption if needed.

20. Do I need my original receipt to redeem the voucher?

It’s best to keep it. While the voucher code itself is what’s scanned or entered, showing the original receipt alongside it can help staff verify your redemption if there’s any issue.

21. My 12-digit code isn’t working on the survey site — what should I do?

Recheck each digit against your receipt for typos, confirm your receipt is still within the valid window, and make sure you’re using the official mcdfoodforthoughts.com site.

22. Is the survey available in languages other than English?

English is the default language on the survey, though a language selection option may be offered depending on the version of the site you reach.

23. Can I take the survey on my phone?

Yes, the survey works on both mobile browsers and desktop computers.

24. Does the survey require an internet connection?

Yes, it’s completed entirely online at mcdfoodforthoughts.com and isn’t available by phone call or in person.

25. What happens to my feedback after I submit it?

Your responses are compiled into feedback data that McDonald’s and individual restaurant managers use to identify service issues and improvement opportunities.

26. Is McDFoodforThoughts available in both the UK and Ireland?

Yes, the programme covers participating McDonald’s restaurants across England, Scotland, Wales, and Ireland, though specific rewards may differ slightly between the UK and Ireland.

27. Why is the reward priced differently in the UK versus Ireland?

Rewards are priced in the local currency of each market — pounds in the UK and euros in Ireland — and the specific meal options offered can vary slightly by market.

28. Is this the same survey as McDVoice?

No. McDVoice is McDonald’s separate customer survey for U.S. locations. McDFoodforThoughts is the equivalent programme specifically for the UK and Ireland, with its own code format, rules, and rewards.

29. What if my receipt is too old to use?

Once the stated window has passed, the code generally stops working, and you’ll need a fresh receipt from a new visit to participate again.

30. Do I need to spend a minimum amount to get a receipt eligible for the survey?

There’s no widely stated minimum spend requirement — any qualifying purchase that generates a receipt with the 12-digit code should be eligible, though this can vary by location.

31. Can I take the survey if I ordered through delivery or a drive-thru?

As long as your receipt includes the 12-digit survey code, it generally doesn’t matter whether you ordered in-store, at a drive-thru, or picked up an in-app order at the counter — check your specific receipt for the code.

32. Who do I contact if I have a problem completing the survey?

If the official site isn’t working or your code won’t validate, your best options are contacting the restaurant where you made your purchase or reaching out through McDonald’s UK customer service channels for further help.

Back to Step-by-Step Guide ↑

Wendys menu 4 for 4

Wendy’s NEW 4 for $4 Menu

Wendy’s NEW 4 for $4 Menu.

Wendy’s has recently added a new 4 for $4 Menu promotion, but for a limited time only.
Wendy’s is currently trying out a “4 for $4 Meal” as a nationwide test.

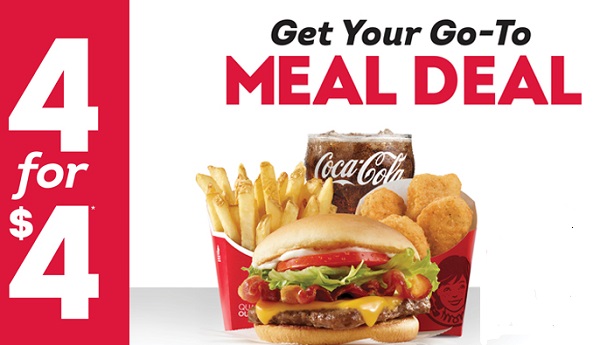
The 4 for $4 Menu includes:

  • Junior bacon cheeseburger.
  • Four chicken nuggets.
  • Small fries.
  • and a small drink.

The menu will stay, if it proves to be a success, but for now it is running for a limited time. No coupon is required.

This offer is not valid in Alaska and Hawaii.

Wendy’s is hoping to lure 1$ offer customers from McDonalds and Taco Bell with this deal, and at the same time ensure that customers spend atleast 4$ per visit.

Time will tell if this is a good strategy. Customer response will determine whether the promotion stays, so get it while you can.

Read more on www.wendys.com and on the Wendy’s Facebook Page.

See the full Wendy’s menu wendys menu.

Wendys menu 4 for 4
Example of the Wendys 4 for 4 menu.

Enjoy!

fast food coupons

Cheesecake Factory Specials and coupons

Cheesecake Factory coupons and specials.

Get Half-Price Cheesecakes at the Cheesecake factory from July 29 – 30.

The Cheesecake Factory promotes annual half-price (50 Off) Cheesecake Days. this year the days are on Wednesday and Thursday, July 29 and 30.

A new flavor has also been introduced: The Salted Caramel Cheesecake.  Cheescake factory customers can try the new cheesecake or any slice of the other  30 flavors for half price on July 29 and July 30, 2015.

Deatails: For dine-in only.  One slice per guest.  The customer must be present.  Valid in US  restaurants only.

 “Say Cheesecake” Contest. 

Post a selfie featuring any of The Cheesecake Factory’s cheesecakes with #SayCheesecakeContest on Twitter or Instagram, from From July 29 – 31, 2015, for a chance to win $1,000 in cash or $100 in Cheesecake Factory eGift Cards. (on Facebook you can post your cheesecake selfie in the comment section of their CheesecakeContest Post).

Cheesecake Factory fans will then vote on photos from August 3 – 5.


Tweet-A-Slice App.

Visit the Cheesecake Factory Tweet-A-Slice webpaeg at merchant.wgiftcard.com/tweetaslice/splash, write a short personal message and pay with your credit card, then authorize the Tweet-A-Slice app to access your Twitter account.  The Cheesecake Factory will then Tweet your friend a $10 eGift Card good for any slice of cheesecake at The Cheesecake Factory. There is NO discount available for this promotional stunt, but who knows, it might take off, and there might be discount in th future.

See the Full Cheesecake factory Menu.

We have added the complete Cheesecake factory menu for your viewing pleasure here:

Cheesecake Factory menu.

-Cheesecake Factory Specials and coupons 2021-2022


panera-bread-gluten-free-salad-menu

Panera Bread Gluten Free Menu

Panera Bread Gluten Free Menu.

What is gluten free at Panera Bread?

What is the Panera Bread “Secret” gluten free menu?

Please note, that there is quite a large risk of cross contamination at Panera Bread, as it is mainly a sandwich and salads shop.

Always let the staff know that you have a gluten allergy and prefer gluten free items. They are used to it, so they know what to recommend. And as always avoid croutons.

Panera Bread Gluten Free Menu.

These are the gluten free items at Panera bread. Feel free to add experiences and recommendations in the comment section below.

Breakfast – Panera Bread Gluten Free.

  • Power Breakfast Egg White Bowl with Roasted Turkey
  • Power Breakfast Egg Bowl with Steak

Lunch and Dinner – Panera Bread Gluten Free.

  • Power Mediterranean Chicken Salad
  • Power Mediterranean Roasted Turkey Salad
  • Power Chicken Hummus Bowl
  • Power Steak Lettuce Wraps

Salads – Panera Bread Gluten Free

Salad Dressings – Panera Bread Gluten Free.

  • Balsamic Vinaigrette
  • Caesar
  • Greek
  • Poppyseed Dressing
  • Asian Sesame Vinaigrette
  • White Balsamic Vinaigrette
  • BBQ Ranch
  • Light Buttermilk Ranch

Soups – Panera Bread Gluten Free.

  • Low Fat Vegetarian Black Bean
  • Creamy Tomato (without croutons)

Drinks – Panera Bread Gluten Free.

  • Coffee
  • Juice, both apple and orange
  • Lemonade
  • Milk
  • Soda, fountain and bottled
  • Tea, regular and Chai Tea
  • All lattes & Frozen beverages
  • Low-fat Strawberry Smoothie
  • Low-Fat Black Cherry Smoothie
  • Low-Fat Mango Smoothie
  • Low-fat Wild Berry Smoothie
  • Frozen Strawberry Lemonade
  • Frozen Lemonade
  • Hot Chocolate

Sides – Panera Bread Gluten Free.

  • Panera Bread Potato Chips.
panera-bread-gluten-free-salad-menu
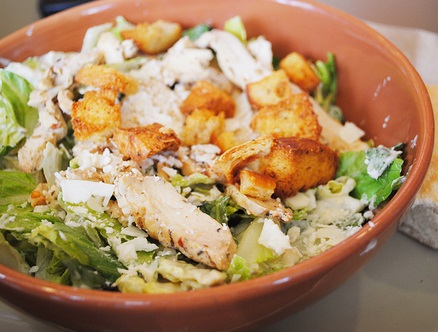
Panera Bread Caesar Salad Total Calories: 440

Panera Bread “Secret Menu” items – Gluten Free.

Also know as the “Panera Bread Power Menu”. Officially, the secret power menu was discontinued in March 2015, but technically you can still order the items by asking for these specific items.


1. Power Breakfast Egg White Bowl with Roasted Turkey
2. Power Breakfast Egg Bowl with Steak
3. Power Mediterranean Chicken Salad
4. Power Mediterranean Roasted Turkey Salad
5. Power Chicken Hummus Bowl
6. Power Steak Lettuce Wraps


Panera Bread Nutrition.

NEWS:

Panera Bread has now publicly (May 2015) posted a comprehensive list of all artificial additives that it has removed — or will remove— from its food menu. The list includes more than 150 ingredients — from BHT to maltodextrin to sulfur dioxide.

Panera also now only sells salads with “clean” salad dressings (without artificial sweeteners, colors, flavors and preservatives).  Ultimately Panera plans to drop all artificial additives from its menu.

-Panera Bread Gluten Free Menu 2015-2016.-

Create a mood board to visualize the overall aesthetic and atmosphere

A mood board is a visual representation of the overall aesthetic and atmosphere of your design project. It’s a collage of images, colors, textures, and other elements that evoke the desired mood and feeling. Here’s a step-by-step guide to creating a mood board:

Step 1: Gather Materials

Printed copies of your design concept sketches or previous work
Magazines, catalogs, and books that inspire you
Fabric swatches, wallpaper samples, or other materials that add texture and interest
Digital tools like Adobe Photoshop or Canva for creating a digital mood board

Step 2: Identify Key Elements

Identify the key elements that define the desired aesthetic and atmosphere:
Color palette: choose 2-3 core colors that evoke the desired mood
Typography: select font styles or typography that align with the mood
Imagery: identify the types of images that fit the mood (e.g., nature, cityscapes, abstract)
Texture: consider the textures that add depth and interest (e.g., rough, smooth, organic)
Mood words: identify key words that describe the desired mood (e.g., calm, energetic, playful)

Step 3: Create a Physical Mood Board

Use a large piece of cardboard, foam board, or paper to create a physical mood board
Arrange the gathered materials in a way that visually represents the desired aesthetic and atmosphere
Add notes, stickers, or other embellishments to reinforce key elements
Step back and review the board to ensure it effectively communicates the desired mood

Step 4: Create a Digital Mood Board

Use Adobe Photoshop or Canva to create a digital mood board
Choose a background color or texture that sets the tone for the design
Add layers for each key element (color palette, typography, imagery, texture)
Adjust sizes, colors, and opacity to achieve the desired balance and visual interest
Save the mood board as a high-resolution file for future reference
Example Mood Board

Here’s an example mood board for a fictional coffee shop:

Physical Mood Board

Background: Warm beige cardboard
Color palette: Rich brown (#754975), creamy white (#F5F5F5), and deep green (#2E865F)
Typography: Serif font with a vintage feel (e.g., Playfair Display)
Imagery: Cozy coffee shop scenes with warm lighting, rustic wood accents, and lush greenery
Texture: Rough-hewn wooden planks and woven baskets
Mood words: Cozy, inviting, earthy

Digital Mood Board

[Image description: A digital mood board with a warm beige background. A rich brown color block sits at the top-left corner, with creamy white text overlay. A vintage-style font reads “Cozy Cup Coffee” in bold letters. Below this is a collage of coffee shop scenes with warm lighting, rustic wood accents, and lush greenery. The background is textured with rough-hewn wooden planks and woven baskets.]

This mood board captures the desired aesthetic and atmosphere of the coffee shop: cozy, inviting, and earthy. The rich color palette and vintage typography evoke a sense of warmth and comfort, while the imagery conveys the rustic charm of the coffee shop.

Develop a list of keywords and concepts related to the brand

I’m happy to help! However, I need more information about the brand you’d like to develop a list of keywords and concepts for. Please provide me with some details about the brand

Step 1: Gather Materials

Printed copies of your design concept sketches or previous work
Magazines, catalogs, and books that inspire you
Fabric swatches, wallpaper samples, or other materials that add texture and interest
Digital tools like Adobe Photoshop or Canva for creating a digital mood board

Step 2: Identify Key Elements

Identify the key elements that define the desired aesthetic and atmosphere:
Color palette: choose 2-3 core colors that evoke the desired mood
Typography: select font styles or typography that align with the mood
Imagery: identify the types of images that fit the mood (e.g., nature, cityscapes, abstract)
Texture: consider the textures that add depth and interest (e.g., rough, smooth, organic)
Mood words: identify key words that describe the desired mood (e.g., calm, energetic, playful)

Step 3: Create a Physical Mood Board

Use a large piece of cardboard, foam board, or paper to create a physical mood board
Arrange the gathered materials in a way that visually represents the desired aesthetic and atmosphere
Add notes, stickers, or other embellishments to reinforce key elements
Step back and review the board to ensure it effectively communicates the desired mood

Step 4: Create a Digital Mood Board

Use Adobe Photoshop or Canva to create a digital mood board
Choose a background color or texture that sets the tone for the design
Add layers for each key element (color palette, typography, imagery, texture)
Adjust sizes, colors, and opacity to achieve the desired balance and visual interest
Save the mood board as a high-resolution file for future reference
Example Mood Board

Here’s an example mood board for a fictional coffee shop:

Physical Mood Board

Background: Warm beige cardboard
Color palette: Rich brown (#754975), creamy white (#F5F5F5), and deep green (#2E865F)
Typography: Serif font with a vintage feel (e.g., Playfair Display)
Imagery: Cozy coffee shop scenes with warm lighting, rustic wood accents, and lush greenery
Texture: Rough-hewn wooden planks and woven baskets
Mood words: Cozy, inviting, earthy

Digital Mood Board

[Image description: A digital mood board with a warm beige background. A rich brown color block sits at the top-left corner, with creamy white text overlay. A vintage-style font reads “Cozy Cup Coffee” in bold letters. Below this is a collage of coffee shop scenes with warm lighting, rustic wood accents, and lush greenery. The background is textured with rough-hewn wooden planks and woven baskets.]

This mood board captures the desired aesthetic and atmosphere of the coffee shop: cozy, inviting, and earthy. The rich color palette and vintage typography evoke a sense of warmth and comfort, while the imagery conveys the rustic charm of the coffee shop.

Provide guidelines for using the logo effectively

Use the minimum size guideline to ensure the logo is visible and recognizable on various digital platforms, including social media, email, and website headers.

Step 1: Gather Materials

Printed copies of your design concept sketches or previous work
Magazines, catalogs, and books that inspire you
Fabric swatches, wallpaper samples, or other materials that add texture and interest
Digital tools like Adobe Photoshop or Canva for creating a digital mood board

Step 2: Identify Key Elements

Identify the key elements that define the desired aesthetic and atmosphere:
Color palette: choose 2-3 core colors that evoke the desired mood
Typography: select font styles or typography that align with the mood
Imagery: identify the types of images that fit the mood (e.g., nature, cityscapes, abstract)
Texture: consider the textures that add depth and interest (e.g., rough, smooth, organic)
Mood words: identify key words that describe the desired mood (e.g., calm, energetic, playful)

Step 3: Create a Physical Mood Board

Use a large piece of cardboard, foam board, or paper to create a physical mood board
Arrange the gathered materials in a way that visually represents the desired aesthetic and atmosphere
Add notes, stickers, or other embellishments to reinforce key elements
Step back and review the board to ensure it effectively communicates the desired mood

Step 4: Create a Digital Mood Board

Use Adobe Photoshop or Canva to create a digital mood board
Choose a background color or texture that sets the tone for the design
Add layers for each key element (color palette, typography, imagery, texture)
Adjust sizes, colors, and opacity to achieve the desired balance and visual interest
Save the mood board as a high-resolution file for future reference
Example Mood Board

Here’s an example mood board for a fictional coffee shop:

Physical Mood Board

Background: Warm beige cardboard
Color palette: Rich brown (#754975), creamy white (#F5F5F5), and deep green (#2E865F)
Typography: Serif font with a vintage feel (e.g., Playfair Display)
Imagery: Cozy coffee shop scenes with warm lighting, rustic wood accents, and lush greenery
Texture: Rough-hewn wooden planks and woven baskets
Mood words: Cozy, inviting, earthy

Digital Mood Board

[Image description: A digital mood board with a warm beige background. A rich brown color block sits at the top-left corner, with creamy white text overlay. A vintage-style font reads “Cozy Cup Coffee” in bold letters. Below this is a collage of coffee shop scenes with warm lighting, rustic wood accents, and lush greenery. The background is textured with rough-hewn wooden planks and woven baskets.]

This mood board captures the desired aesthetic and atmosphere of the coffee shop: cozy, inviting, and earthy. The rich color palette and vintage typography evoke a sense of warmth and comfort, while the imagery conveys the rustic charm of the coffee shop.

Deliver the final design files to stakeholders or clients

As a designer, you’ve put in the hard work to create a fantastic design. Now, it’s time to share the final files with your stakeholders or clients. Here’s a step-by-step guide to ensure a smooth and successful delivery

Step 1: Gather Materials

Printed copies of your design concept sketches or previous work
Magazines, catalogs, and books that inspire you
Fabric swatches, wallpaper samples, or other materials that add texture and interest
Digital tools like Adobe Photoshop or Canva for creating a digital mood board

Step 2: Identify Key Elements

Identify the key elements that define the desired aesthetic and atmosphere:
Color palette: choose 2-3 core colors that evoke the desired mood
Typography: select font styles or typography that align with the mood
Imagery: identify the types of images that fit the mood (e.g., nature, cityscapes, abstract)
Texture: consider the textures that add depth and interest (e.g., rough, smooth, organic)
Mood words: identify key words that describe the desired mood (e.g., calm, energetic, playful)

Step 3: Create a Physical Mood Board

Use a large piece of cardboard, foam board, or paper to create a physical mood board
Arrange the gathered materials in a way that visually represents the desired aesthetic and atmosphere
Add notes, stickers, or other embellishments to reinforce key elements
Step back and review the board to ensure it effectively communicates the desired mood

Step 4: Create a Digital Mood Board

Use Adobe Photoshop or Canva to create a digital mood board
Choose a background color or texture that sets the tone for the design
Add layers for each key element (color palette, typography, imagery, texture)
Adjust sizes, colors, and opacity to achieve the desired balance and visual interest
Save the mood board as a high-resolution file for future reference
Example Mood Board

Here’s an example mood board for a fictional coffee shop:

Physical Mood Board

Background: Warm beige cardboard
Color palette: Rich brown (#754975), creamy white (#F5F5F5), and deep green (#2E865F)
Typography: Serif font with a vintage feel (e.g., Playfair Display)
Imagery: Cozy coffee shop scenes with warm lighting, rustic wood accents, and lush greenery
Texture: Rough-hewn wooden planks and woven baskets
Mood words: Cozy, inviting, earthy

Digital Mood Board

[Image description: A digital mood board with a warm beige background. A rich brown color block sits at the top-left corner, with creamy white text overlay. A vintage-style font reads “Cozy Cup Coffee” in bold letters. Below this is a collage of coffee shop scenes with warm lighting, rustic wood accents, and lush greenery. The background is textured with rough-hewn wooden planks and woven baskets.]

This mood board captures the desired aesthetic and atmosphere of the coffee shop: cozy, inviting, and earthy. The rich color palette and vintage typography evoke a sense of warmth and comfort, while the imagery conveys the rustic charm of the coffee shop.

Consider different perspectives and opinions to ensure the design is widely accepted

When considering different perspectives and opinions, you’re ensuring that your design is inclusive, accessible, and appealing to a wide range of users. This approach helps to

Step 1: Gather Materials

Printed copies of your design concept sketches or previous work
Magazines, catalogs, and books that inspire you
Fabric swatches, wallpaper samples, or other materials that add texture and interest
Digital tools like Adobe Photoshop or Canva for creating a digital mood board

Step 2: Identify Key Elements

Identify the key elements that define the desired aesthetic and atmosphere:
Color palette: choose 2-3 core colors that evoke the desired mood
Typography: select font styles or typography that align with the mood
Imagery: identify the types of images that fit the mood (e.g., nature, cityscapes, abstract)
Texture: consider the textures that add depth and interest (e.g., rough, smooth, organic)
Mood words: identify key words that describe the desired mood (e.g., calm, energetic, playful)

Step 3: Create a Physical Mood Board

Use a large piece of cardboard, foam board, or paper to create a physical mood board
Arrange the gathered materials in a way that visually represents the desired aesthetic and atmosphere
Add notes, stickers, or other embellishments to reinforce key elements
Step back and review the board to ensure it effectively communicates the desired mood

Step 4: Create a Digital Mood Board

Use Adobe Photoshop or Canva to create a digital mood board
Choose a background color or texture that sets the tone for the design
Add layers for each key element (color palette, typography, imagery, texture)
Adjust sizes, colors, and opacity to achieve the desired balance and visual interest
Save the mood board as a high-resolution file for future reference
Example Mood Board

Here’s an example mood board for a fictional coffee shop:

Physical Mood Board

Background: Warm beige cardboard
Color palette: Rich brown (#754975), creamy white (#F5F5F5), and deep green (#2E865F)
Typography: Serif font with a vintage feel (e.g., Playfair Display)
Imagery: Cozy coffee shop scenes with warm lighting, rustic wood accents, and lush greenery
Texture: Rough-hewn wooden planks and woven baskets
Mood words: Cozy, inviting, earthy

Color palette selection, contrast, and harmony

The wonderful world of color!

Color palette selection, contrast, and harmony are essential elements in designing visually appealing and effective visual communications. Here’s a breakdown of each:

Color Palette Selection

A color palette is a selection of colors used in a design project. When choosing a color palette, consider the following:

Step 1: Gather Materials

Printed copies of your design concept sketches or previous work
Magazines, catalogs, and books that inspire you
Fabric swatches, wallpaper samples, or other materials that add texture and interest
Digital tools like Adobe Photoshop or Canva for creating a digital mood board

Step 2: Identify Key Elements

Identify the key elements that define the desired aesthetic and atmosphere:
Color palette: choose 2-3 core colors that evoke the desired mood
Typography: select font styles or typography that align with the mood
Imagery: identify the types of images that fit the mood (e.g., nature, cityscapes, abstract)
Texture: consider the textures that add depth and interest (e.g., rough, smooth, organic)
Mood words: identify key words that describe the desired mood (e.g., calm, energetic, playful)

Step 3: Create a Physical Mood Board

Use a large piece of cardboard, foam board, or paper to create a physical mood board
Arrange the gathered materials in a way that visually represents the desired aesthetic and atmosphere
Add notes, stickers, or other embellishments to reinforce key elements
Step back and review the board to ensure it effectively communicates the desired mood

Step 4: Create a Digital Mood Board

Use Adobe Photoshop or Canva to create a digital mood board
Choose a background color or texture that sets the tone for the design
Add layers for each key element (color palette, typography, imagery, texture)
Adjust sizes, colors, and opacity to achieve the desired balance and visual interest
Save the mood board as a high-resolution file for future reference
Example Mood Board

Here’s an example mood board for a fictional coffee shop:

Physical Mood Board

Background: Warm beige cardboard
Color palette: Rich brown (#754975), creamy white (#F5F5F5), and deep green (#2E865F)
Typography: Serif font with a vintage feel (e.g., Playfair Display)
Imagery: Cozy coffee shop scenes with warm lighting, rustic wood accents, and lush greenery
Texture: Rough-hewn wooden planks and woven baskets
Mood words: Cozy, inviting, earthy

Develop a more detailed design concept, including typography, color palette, and imagery

Based on the initial concept of a modern and futuristic travel company, I’d like to propose a more detailed design concept that incorporates typography, color palette, and imagery.

Step 1: Gather Materials

Printed copies of your design concept sketches or previous work
Magazines, catalogs, and books that inspire you
Fabric swatches, wallpaper samples, or other materials that add texture and interest
Digital tools like Adobe Photoshop or Canva for creating a digital mood board

Step 2: Identify Key Elements

Identify the key elements that define the desired aesthetic and atmosphere:
Color palette: choose 2-3 core colors that evoke the desired mood
Typography: select font styles or typography that align with the mood
Imagery: identify the types of images that fit the mood (e.g., nature, cityscapes, abstract)
Texture: consider the textures that add depth and interest (e.g., rough, smooth, organic)
Mood words: identify key words that describe the desired mood (e.g., calm, energetic, playful)

Step 3: Create a Physical Mood Board

Use a large piece of cardboard, foam board, or paper to create a physical mood board
Arrange the gathered materials in a way that visually represents the desired aesthetic and atmosphere
Add notes, stickers, or other embellishments to reinforce key elements
Step back and review the board to ensure it effectively communicates the desired mood

Step 4: Create a Digital Mood Board

Use Adobe Photoshop or Canva to create a digital mood board
Choose a background color or texture that sets the tone for the design
Add layers for each key element (color palette, typography, imagery, texture)
Adjust sizes, colors, and opacity to achieve the desired balance and visual interest
Save the mood board as a high-resolution file for future reference
Example Mood Board

Here’s an example mood board for a fictional coffee shop:

Physical Mood Board

Background: Warm beige cardboard
Color palette: Rich brown (#754975), creamy white (#F5F5F5), and deep green (#2E865F)
Typography: Serif font with a vintage feel (e.g., Playfair Display)
Imagery: Cozy coffee shop scenes with warm lighting, rustic wood accents, and lush greenery
Texture: Rough-hewn wooden planks and woven baskets
Mood words: Cozy, inviting, earthy

Brainstorm different concepts and variations

I’d be happy to help you brainstorm different concepts and variations. Can you please provide some more context or details about what you’re looking for? For example

Step 1: Gather Materials

Printed copies of your design concept sketches or previous work
Magazines, catalogs, and books that inspire you
Fabric swatches, wallpaper samples, or other materials that add texture and interest
Digital tools like Adobe Photoshop or Canva for creating a digital mood board

Step 2: Identify Key Elements

Identify the key elements that define the desired aesthetic and atmosphere:
Color palette: choose 2-3 core colors that evoke the desired mood
Typography: select font styles or typography that align with the mood
Imagery: identify the types of images that fit the mood (e.g., nature, cityscapes, abstract)
Texture: consider the textures that add depth and interest (e.g., rough, smooth, organic)
Mood words: identify key words that describe the desired mood (e.g., calm, energetic, playful)

Step 3: Create a Physical Mood Board

Use a large piece of cardboard, foam board, or paper to create a physical mood board
Arrange the gathered materials in a way that visually represents the desired aesthetic and atmosphere
Add notes, stickers, or other embellishments to reinforce key elements
Step back and review the board to ensure it effectively communicates the desired mood

Step 4: Create a Digital Mood Board

Use Adobe Photoshop or Canva to create a digital mood board
Choose a background color or texture that sets the tone for the design
Add layers for each key element (color palette, typography, imagery, texture)
Adjust sizes, colors, and opacity to achieve the desired balance and visual interest
Save the mood board as a high-resolution file for future reference
Example Mood Board

Here’s an example mood board for a fictional coffee shop:

Physical Mood Board

Background: Warm beige cardboard
Color palette: Rich brown (#754975), creamy white (#F5F5F5), and deep green (#2E865F)
Typography: Serif font with a vintage feel (e.g., Playfair Display)
Imagery: Cozy coffee shop scenes with warm lighting, rustic wood accents, and lush greenery
Texture: Rough-hewn wooden planks and woven baskets
Mood words: Cozy, inviting, earthy

Identify the key message and personality of the brand

I’d be happy to help you identify the key message and personality of a brand! To do this, I’ll need some information about the brand.

Step 1: Gather Materials

Printed copies of your design concept sketches or previous work
Magazines, catalogs, and books that inspire you
Fabric swatches, wallpaper samples, or other materials that add texture and interest
Digital tools like Adobe Photoshop or Canva for creating a digital mood board

Step 2: Identify Key Elements

Identify the key elements that define the desired aesthetic and atmosphere:
Color palette: choose 2-3 core colors that evoke the desired mood
Typography: select font styles or typography that align with the mood
Imagery: identify the types of images that fit the mood (e.g., nature, cityscapes, abstract)
Texture: consider the textures that add depth and interest (e.g., rough, smooth, organic)
Mood words: identify key words that describe the desired mood (e.g., calm, energetic, playful)

Step 3: Create a Physical Mood Board

Use a large piece of cardboard, foam board, or paper to create a physical mood board
Arrange the gathered materials in a way that visually represents the desired aesthetic and atmosphere
Add notes, stickers, or other embellishments to reinforce key elements
Step back and review the board to ensure it effectively communicates the desired mood

Step 4: Create a Digital Mood Board

Use Adobe Photoshop or Canva to create a digital mood board
Choose a background color or texture that sets the tone for the design
Add layers for each key element (color palette, typography, imagery, texture)
Adjust sizes, colors, and opacity to achieve the desired balance and visual interest
Save the mood board as a high-resolution file for future reference
Example Mood Board

Here’s an example mood board for a fictional coffee shop:

Physical Mood Board

Background: Warm beige cardboard
Color palette: Rich brown (#754975), creamy white (#F5F5F5), and deep green (#2E865F)
Typography: Serif font with a vintage feel (e.g., Playfair Display)
Imagery: Cozy coffee shop scenes with warm lighting, rustic wood accents, and lush greenery
Texture: Rough-hewn wooden planks and woven baskets
Mood words: Cozy, inviting, earthy

Create high-resolution files for various applications

Here are some examples of how to create high-resolution files for various applications

Step 1: Gather Materials

Printed copies of your design concept sketches or previous work
Magazines, catalogs, and books that inspire you
Fabric swatches, wallpaper samples, or other materials that add texture and interest
Digital tools like Adobe Photoshop or Canva for creating a digital mood board

Step 2: Identify Key Elements

Identify the key elements that define the desired aesthetic and atmosphere:
Color palette: choose 2-3 core colors that evoke the desired mood
Typography: select font styles or typography that align with the mood
Imagery: identify the types of images that fit the mood (e.g., nature, cityscapes, abstract)
Texture: consider the textures that add depth and interest (e.g., rough, smooth, organic)
Mood words: identify key words that describe the desired mood (e.g., calm, energetic, playful)

Step 3: Create a Physical Mood Board

Use a large piece of cardboard, foam board, or paper to create a physical mood board
Arrange the gathered materials in a way that visually represents the desired aesthetic and atmosphere
Add notes, stickers, or other embellishments to reinforce key elements
Step back and review the board to ensure it effectively communicates the desired mood

Step 4: Create a Digital Mood Board

Use Adobe Photoshop or Canva to create a digital mood board
Choose a background color or texture that sets the tone for the design
Add layers for each key element (color palette, typography, imagery, texture)
Adjust sizes, colors, and opacity to achieve the desired balance and visual interest
Save the mood board as a high-resolution file for future reference
Example Mood Board

Here’s an example mood board for a fictional coffee shop:

Physical Mood Board

Background: Warm beige cardboard
Color palette: Rich brown (#754975), creamy white (#F5F5F5), and deep green (#2E865F)
Typography: Serif font with a vintage feel (e.g., Playfair Display)
Imagery: Cozy coffee shop scenes with warm lighting, rustic wood accents, and lush greenery
Texture: Rough-hewn wooden planks and woven baskets
Mood words: Cozy, inviting, earthy

Gather feedback and incorporate revisions to improve the design

The iterative design process! Here’s a step-by-step guide on how to gather feedback and incorporate revisions to improve the design

Step 1: Gather Materials

Printed copies of your design concept sketches or previous work
Magazines, catalogs, and books that inspire you
Fabric swatches, wallpaper samples, or other materials that add texture and interest
Digital tools like Adobe Photoshop or Canva for creating a digital mood board

Step 2: Identify Key Elements

Identify the key elements that define the desired aesthetic and atmosphere:
Color palette: choose 2-3 core colors that evoke the desired mood
Typography: select font styles or typography that align with the mood
Imagery: identify the types of images that fit the mood (e.g., nature, cityscapes, abstract)
Texture: consider the textures that add depth and interest (e.g., rough, smooth, organic)
Mood words: identify key words that describe the desired mood (e.g., calm, energetic, playful)

Step 3: Create a Physical Mood Board

Use a large piece of cardboard, foam board, or paper to create a physical mood board
Arrange the gathered materials in a way that visually represents the desired aesthetic and atmosphere
Add notes, stickers, or other embellishments to reinforce key elements
Step back and review the board to ensure it effectively communicates the desired mood

Step 4: Create a Digital Mood Board

Use Adobe Photoshop or Canva to create a digital mood board
Choose a background color or texture that sets the tone for the design
Add layers for each key element (color palette, typography, imagery, texture)
Adjust sizes, colors, and opacity to achieve the desired balance and visual interest
Save the mood board as a high-resolution file for future reference
Example Mood Board

Here’s an example mood board for a fictional coffee shop:

Physical Mood Board

Background: Warm beige cardboard
Color palette: Rich brown (#754975), creamy white (#F5F5F5), and deep green (#2E865F)
Typography: Serif font with a vintage feel (e.g., Playfair Display)
Imagery: Cozy coffee shop scenes with warm lighting, rustic wood accents, and lush greenery
Texture: Rough-hewn wooden planks and woven baskets
Mood words: Cozy, inviting, earthy

Digital Mood Board

[Image description: A digital mood board with a warm beige background. A rich brown color block sits at the top-left corner, with creamy white text overlay. A vintage-style font reads “Cozy Cup Coffee” in bold letters. Below this is a collage of coffee shop scenes with warm lighting, rustic wood accents, and lush greenery. The background is textured with rough-hewn wooden planks and woven baskets.

Typography font choice, size, and spacing

Typography is a crucial aspect of visual design, and choosing the right font, size, and spacing can greatly impact the readability, aesthetics, and overall effectiveness of your design. Here are some guidelines to help you make informed decisions

Step 1: Gather Materials

Printed copies of your design concept sketches or previous work
Magazines, catalogs, and books that inspire you
Fabric swatches, wallpaper samples, or other materials that add texture and interest
Digital tools like Adobe Photoshop or Canva for creating a digital mood board

Step 2: Identify Key Elements

Identify the key elements that define the desired aesthetic and atmosphere:
Color palette: choose 2-3 core colors that evoke the desired mood
Typography: select font styles or typography that align with the mood
Imagery: identify the types of images that fit the mood (e.g., nature, cityscapes, abstract)
Texture: consider the textures that add depth and interest (e.g., rough, smooth, organic)
Mood words: identify key words that describe the desired mood (e.g., calm, energetic, playful)

Step 3: Create a Physical Mood Board

Use a large piece of cardboard, foam board, or paper to create a physical mood board
Arrange the gathered materials in a way that visually represents the desired aesthetic and atmosphere
Add notes, stickers, or other embellishments to reinforce key elements
Step back and review the board to ensure it effectively communicates the desired mood

Step 4: Create a Digital Mood Board

Use Adobe Photoshop or Canva to create a digital mood board
Choose a background color or texture that sets the tone for the design
Add layers for each key element (color palette, typography, imagery, texture)
Adjust sizes, colors, and opacity to achieve the desired balance and visual interest
Save the mood board as a high-resolution file for future reference
Example Mood Board

Here’s an example mood board for a fictional coffee shop:

Physical Mood Board

Background: Warm beige cardboard
Color palette: Rich brown (#754975), creamy white (#F5F5F5), and deep green (#2E865F)
Typography: Serif font with a vintage feel (e.g., Playfair Display)
Imagery: Cozy coffee shop scenes with warm lighting, rustic wood accents, and lush greenery
Texture: Rough-hewn wooden planks and woven baskets
Mood words: Cozy, inviting, earthy

Digital Mood Board

[Image description: A digital mood board with a warm beige background. A rich brown color block sits at the top-left corner, with creamy white text overlay. A vintage-style font reads “Cozy Cup Coffee” in bold letters. Below this is a collage of coffee shop scenes with warm lighting, rustic wood accents, and lush greenery. The background is textured with rough-hewn wooden planks and woven baskets.]

This mood board captures the desired aesthetic and atmosphere of the coffee shop: cozy, inviting, and earthy. The rich color palette and vintage typography evoke a sense of warmth and comfort, while the imagery conveys the rustic charm of the coffee shop.

Select the most promising ideas and refine them

If you don’t have any ideas yet, we can start brainstorming together. What problem or area are you interested in exploring? Do you have a specific industry, market, or audience in mind?

Step 1: Gather Materials

Printed copies of your design concept sketches or previous work
Magazines, catalogs, and books that inspire you
Fabric swatches, wallpaper samples, or other materials that add texture and interest
Digital tools like Adobe Photoshop or Canva for creating a digital mood board

Step 2: Identify Key Elements

Identify the key elements that define the desired aesthetic and atmosphere:
Color palette: choose 2-3 core colors that evoke the desired mood
Typography: select font styles or typography that align with the mood
Imagery: identify the types of images that fit the mood (e.g., nature, cityscapes, abstract)
Texture: consider the textures that add depth and interest (e.g., rough, smooth, organic)
Mood words: identify key words that describe the desired mood (e.g., calm, energetic, playful)

Step 3: Create a Physical Mood Board

Use a large piece of cardboard, foam board, or paper to create a physical mood board
Arrange the gathered materials in a way that visually represents the desired aesthetic and atmosphere
Add notes, stickers, or other embellishments to reinforce key elements
Step back and review the board to ensure it effectively communicates the desired mood

Step 4: Create a Digital Mood Board

Use Adobe Photoshop or Canva to create a digital mood board
Choose a background color or texture that sets the tone for the design
Add layers for each key element (color palette, typography, imagery, texture)
Adjust sizes, colors, and opacity to achieve the desired balance and visual interest
Save the mood board as a high-resolution file for future reference
Example Mood Board

Here’s an example mood board for a fictional coffee shop:

Physical Mood Board

Background: Warm beige cardboard
Color palette: Rich brown (#754975), creamy white (#F5F5F5), and deep green (#2E865F)
Typography: Serif font with a vintage feel (e.g., Playfair Display)
Imagery: Cozy coffee shop scenes with warm lighting, rustic wood accents, and lush greenery
Texture: Rough-hewn wooden planks and woven baskets
Mood words: Cozy, inviting, earthy

Digital Mood Board

[Image description: A digital mood board with a warm beige background. A rich brown color block sits at the top-left corner, with creamy white text overlay. A vintage-style font reads “Cozy Cup Coffee” in bold letters. Below this is a collage of coffee shop scenes with warm lighting, rustic wood accents, and lush greenery. The background is textured with rough-hewn wooden planks and woven baskets.]

This mood board captures the desired aesthetic and atmosphere of the coffee shop: cozy, inviting, and earthy. The rich color palette and vintage typography evoke a sense of warmth and comfort, while the imagery conveys the rustic charm of the coffee shop.